Task 1
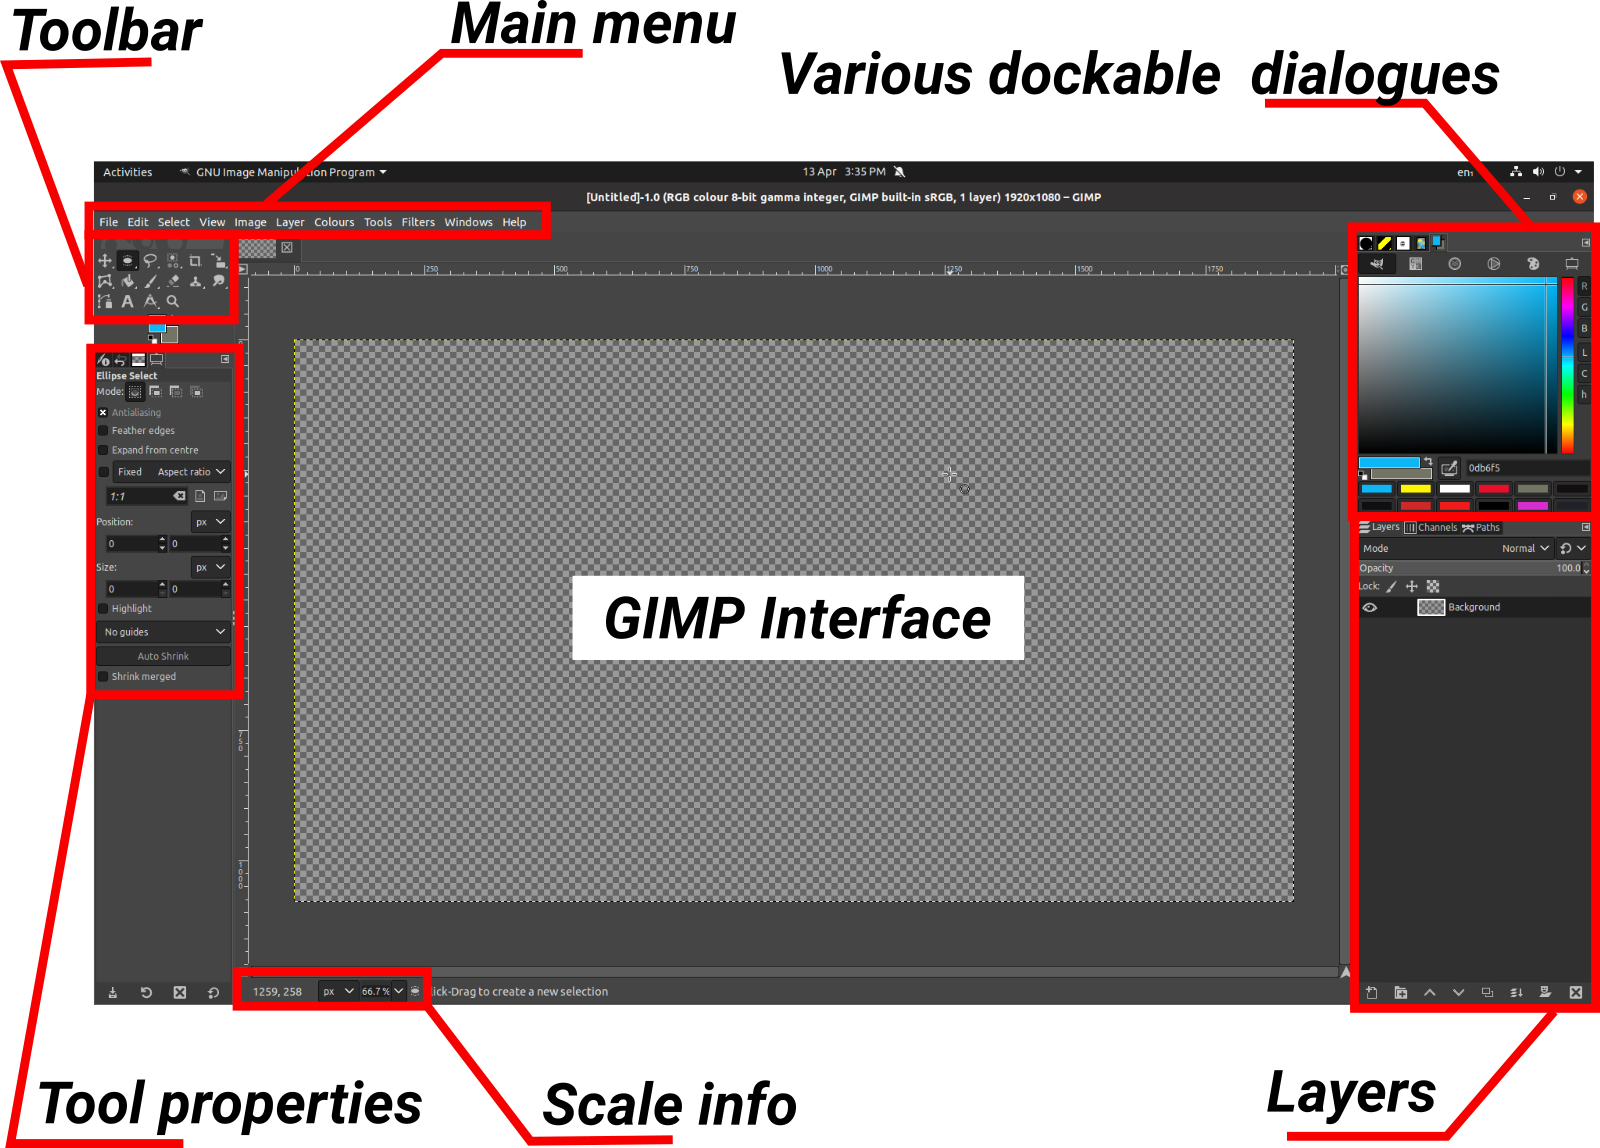 GIMP Interface
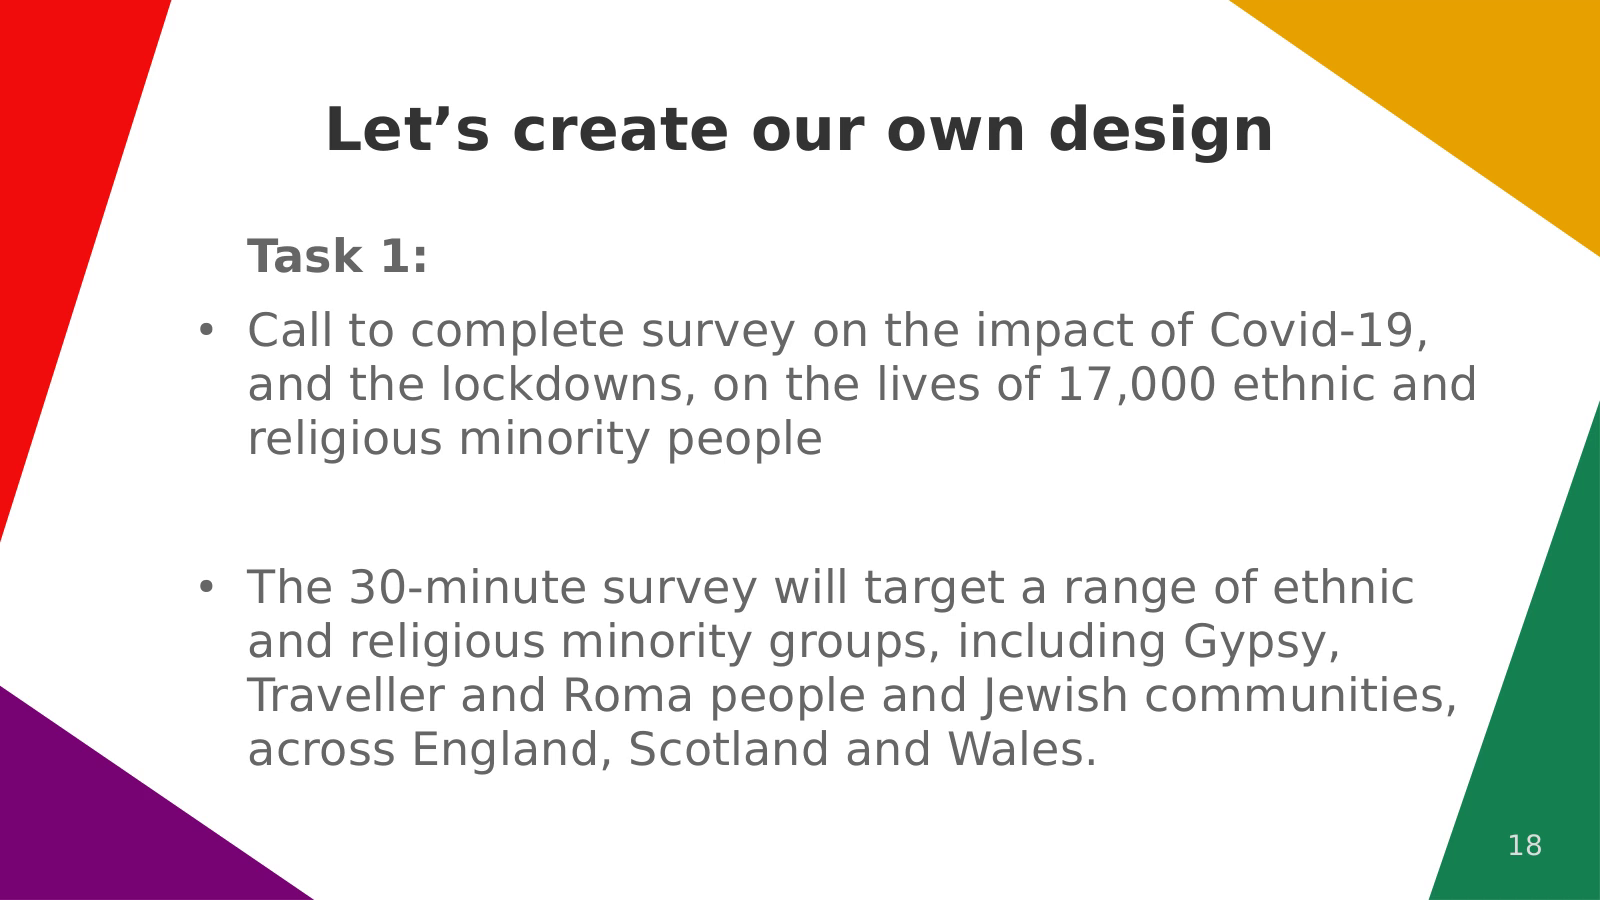 Sam prepared a task for us to practice Gimp through creation and design
of a flier for a survey of community organising.
Sam prepared a task for us to practice Gimp through creation and design
of a flier for a survey of community organising.
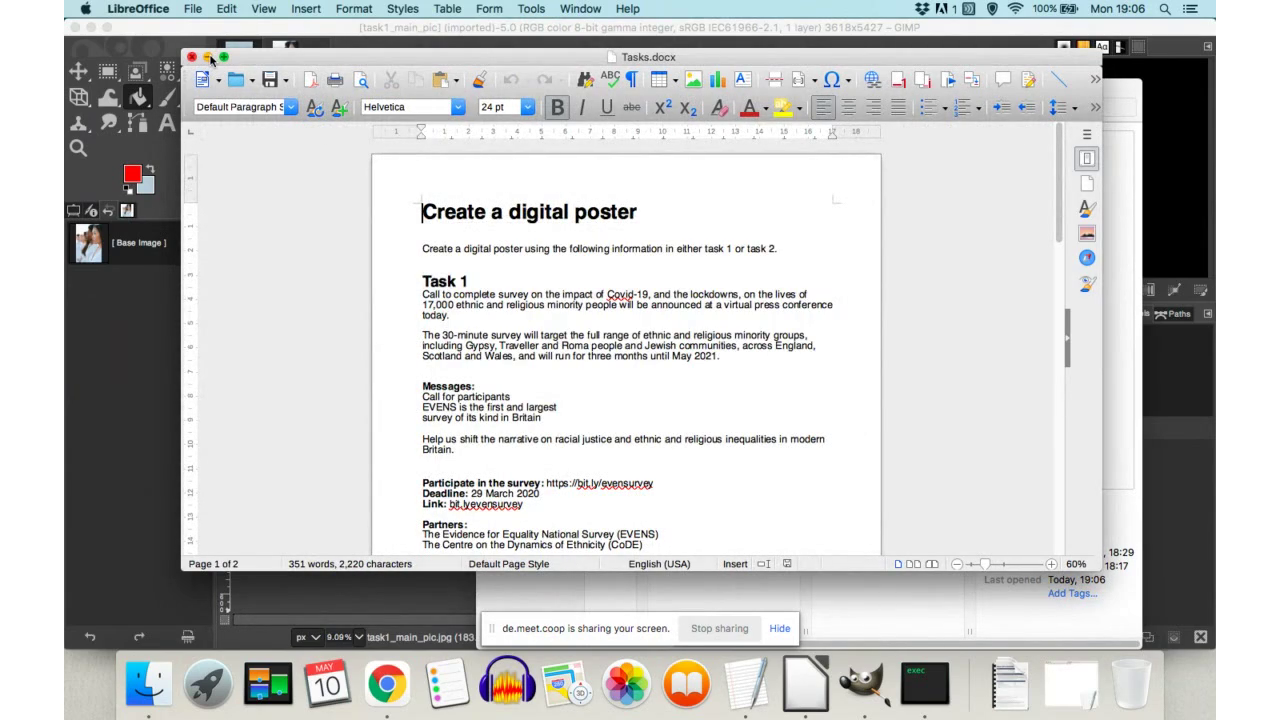 We’ll start by downloading all the files we need to use for this task.
Please click here for zip file with all materials for this tutorial.
We’ll start by downloading all the files we need to use for this task.
Please click here for zip file with all materials for this tutorial.
 When you downland the zip, unzip it and save files in appropriate folder
of your choice, we proceed by opening Gimp and File>Open file from
main menu on the top left corner.
When you downland the zip, unzip it and save files in appropriate folder
of your choice, we proceed by opening Gimp and File>Open file from
main menu on the top left corner.
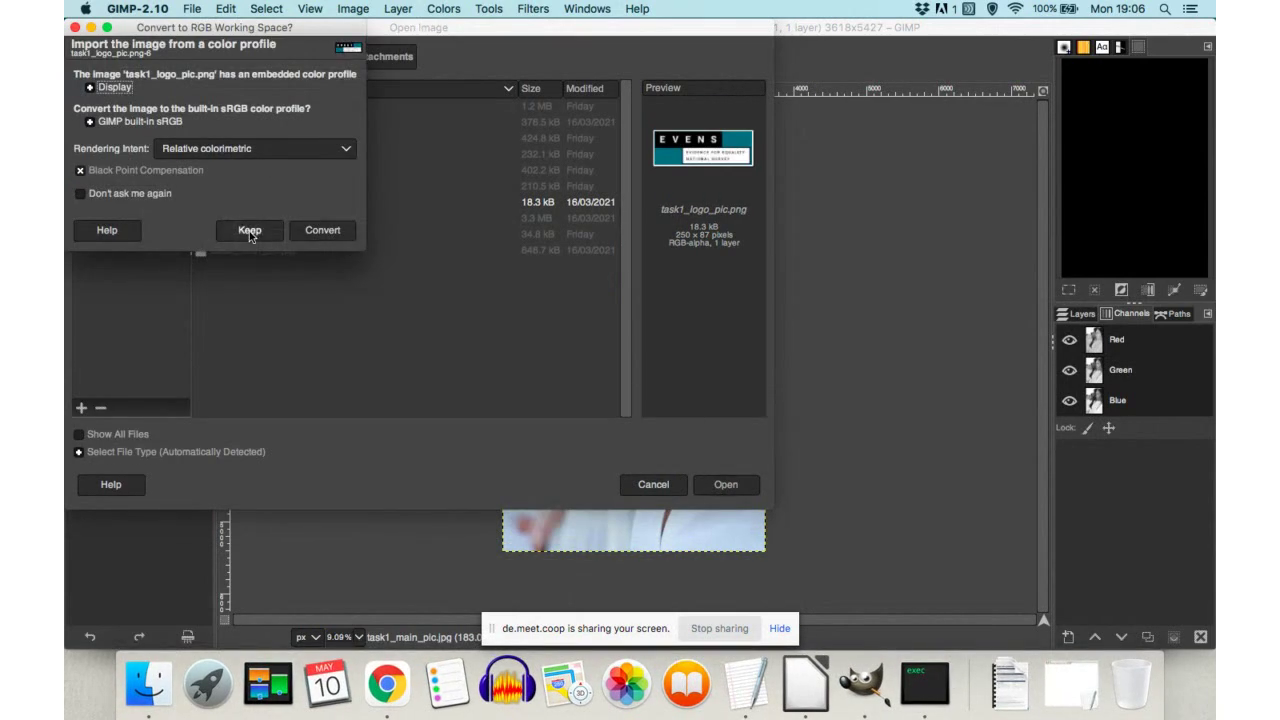 Gimp will prompt you to either accept (Convert) or reject (Keep) colour
profile, we suggest you try both to figure our which works better for
you.
Gimp will prompt you to either accept (Convert) or reject (Keep) colour
profile, we suggest you try both to figure our which works better for
you.
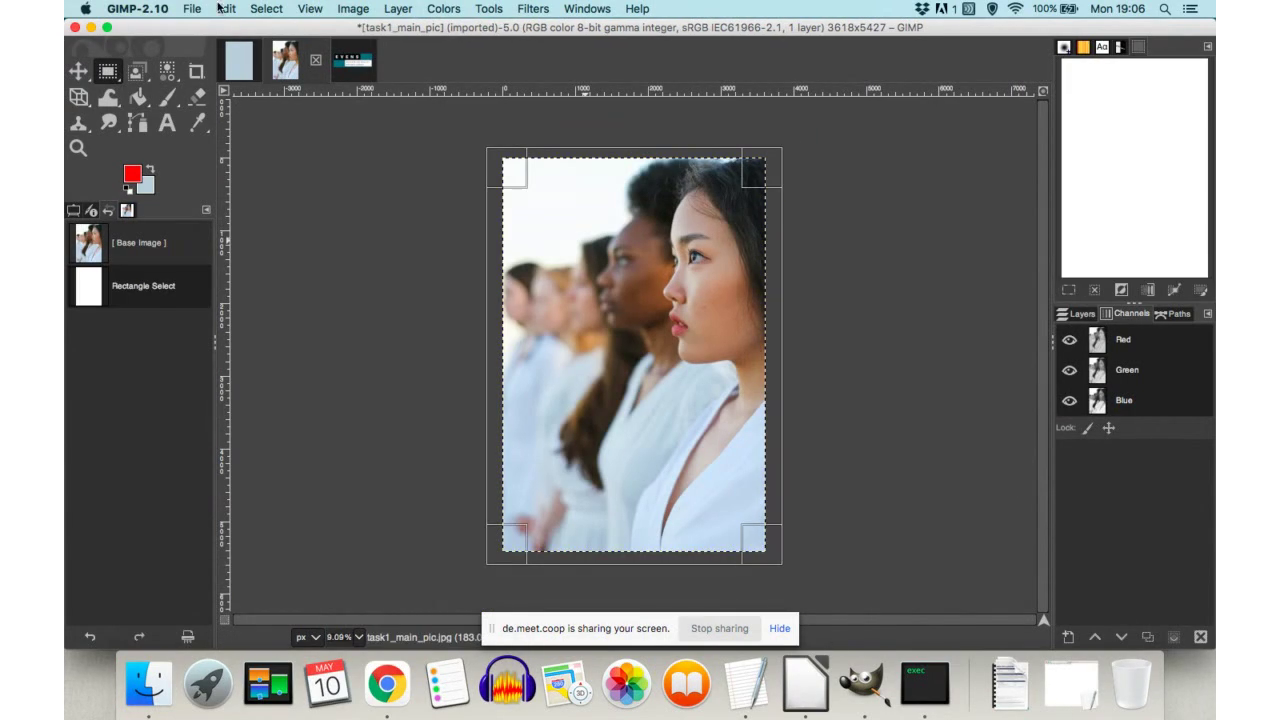 Once we opened the main image and logo, you will create a new file (in
this case background colour was light blue, this can be changed and
has no impact in this case). Select the main image with rectangle
select tool (second icon in the toolbox) and paste it in the new
document.
Once we opened the main image and logo, you will create a new file (in
this case background colour was light blue, this can be changed and
has no impact in this case). Select the main image with rectangle
select tool (second icon in the toolbox) and paste it in the new
document.
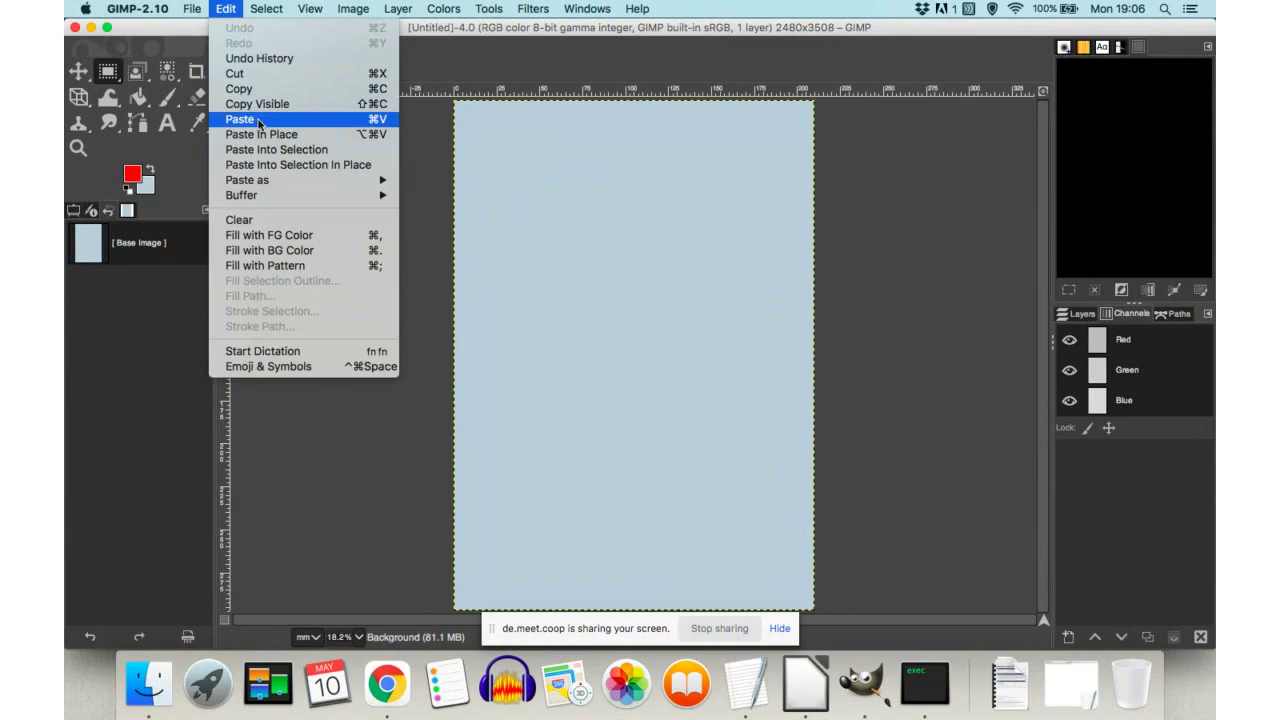 We can either use main menu and paste copied selections via right-click
or by selecting Edit>Paste from drop-down menu as in this picture.
We can either use main menu and paste copied selections via right-click
or by selecting Edit>Paste from drop-down menu as in this picture.
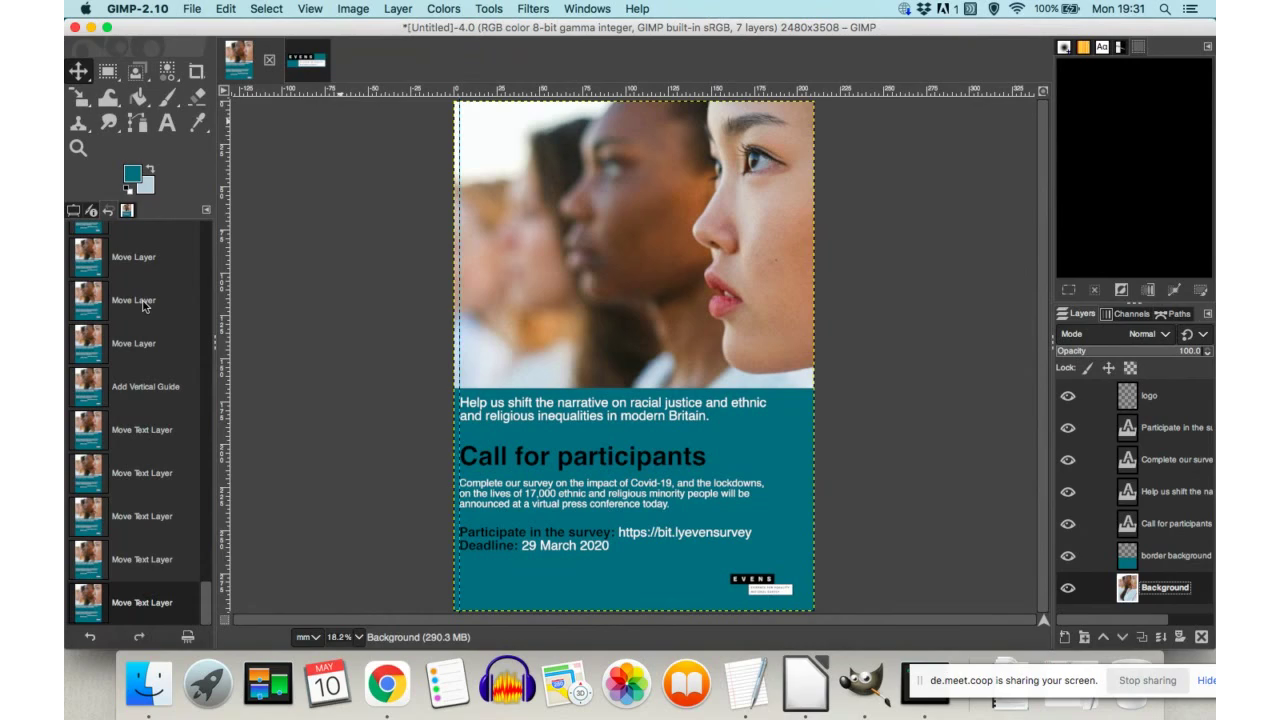
 Once we pasted the selection, ‘Pasted layer’ will appear in the
bottom-right side of the Gimp interface – this is where all layers
are organised. If you want to include the pasted selection into an
existing layer, then click on a little green anchor icon or add a new
layer (as in this picture) whilst having the pasted layer selected.
Once we pasted the selection, ‘Pasted layer’ will appear in the
bottom-right side of the Gimp interface – this is where all layers
are organised. If you want to include the pasted selection into an
existing layer, then click on a little green anchor icon or add a new
layer (as in this picture) whilst having the pasted layer selected.
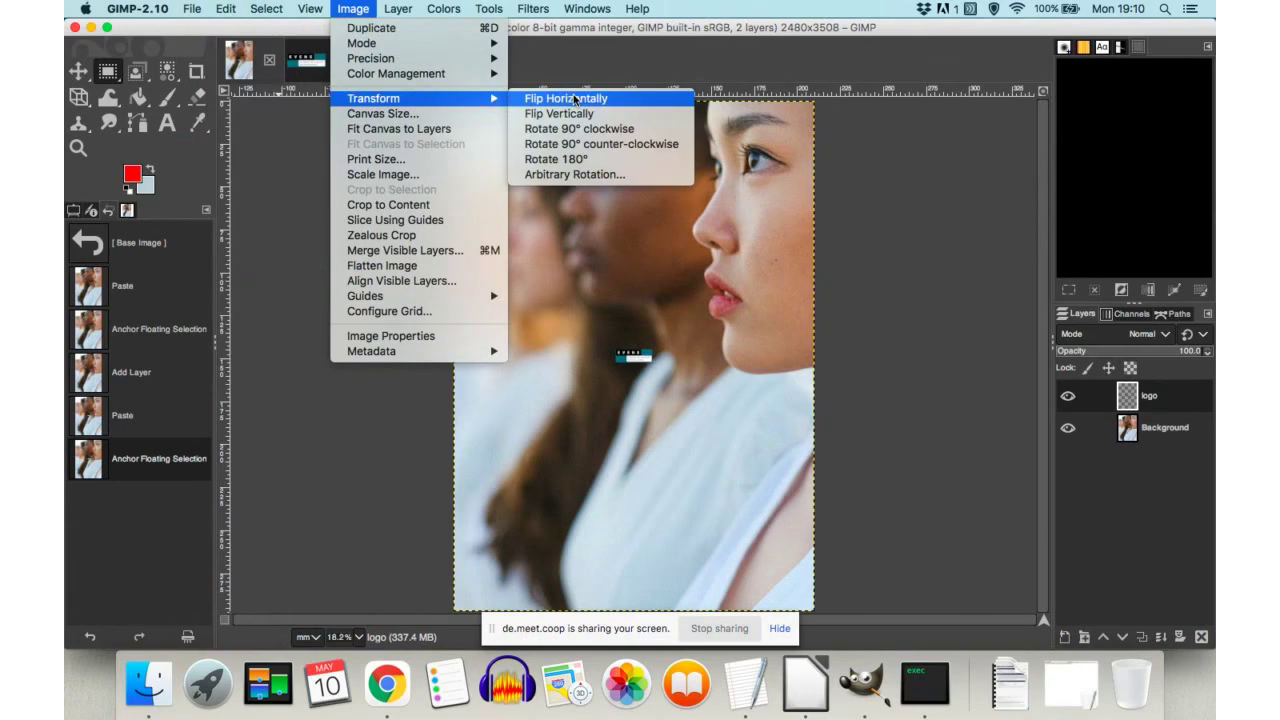 Every part of the image can be transformed: in this case that means it can
be scaled flipped and rotated. One of the possible ways to flip and
rotate is to select Image>Transform>Flip or Rotate form the
main menu.
Every part of the image can be transformed: in this case that means it can
be scaled flipped and rotated. One of the possible ways to flip and
rotate is to select Image>Transform>Flip or Rotate form the
main menu.
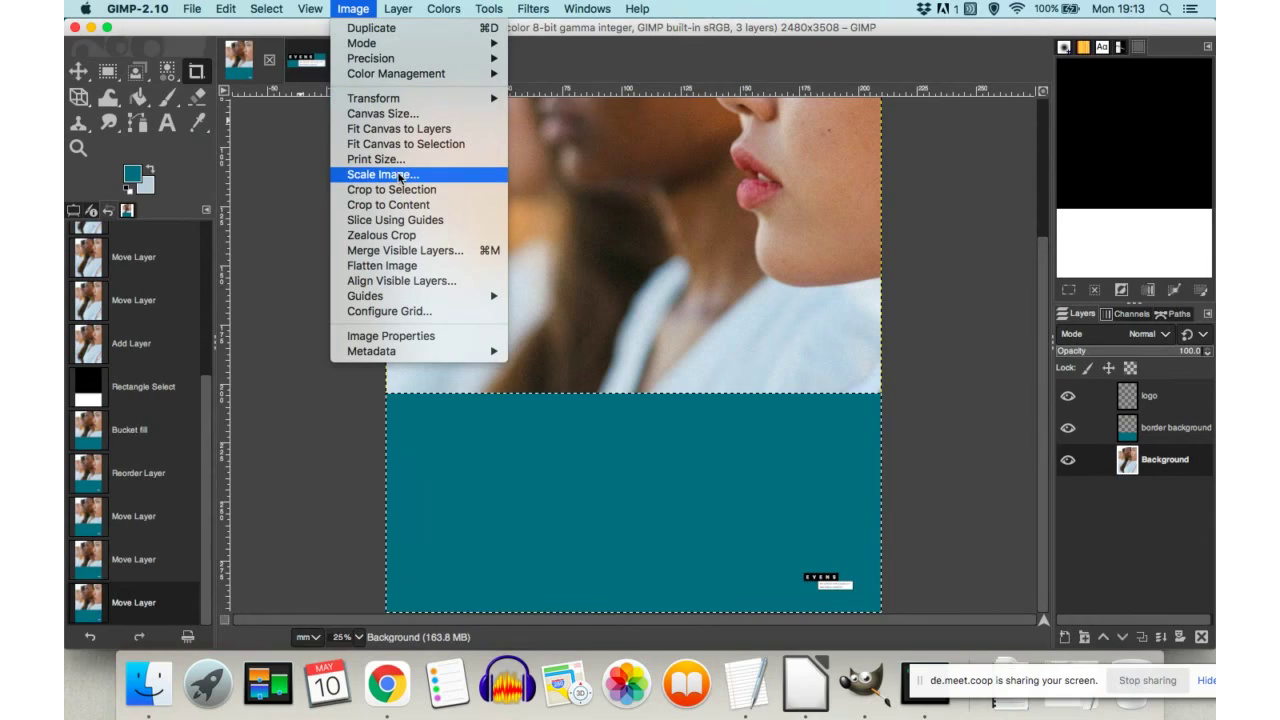
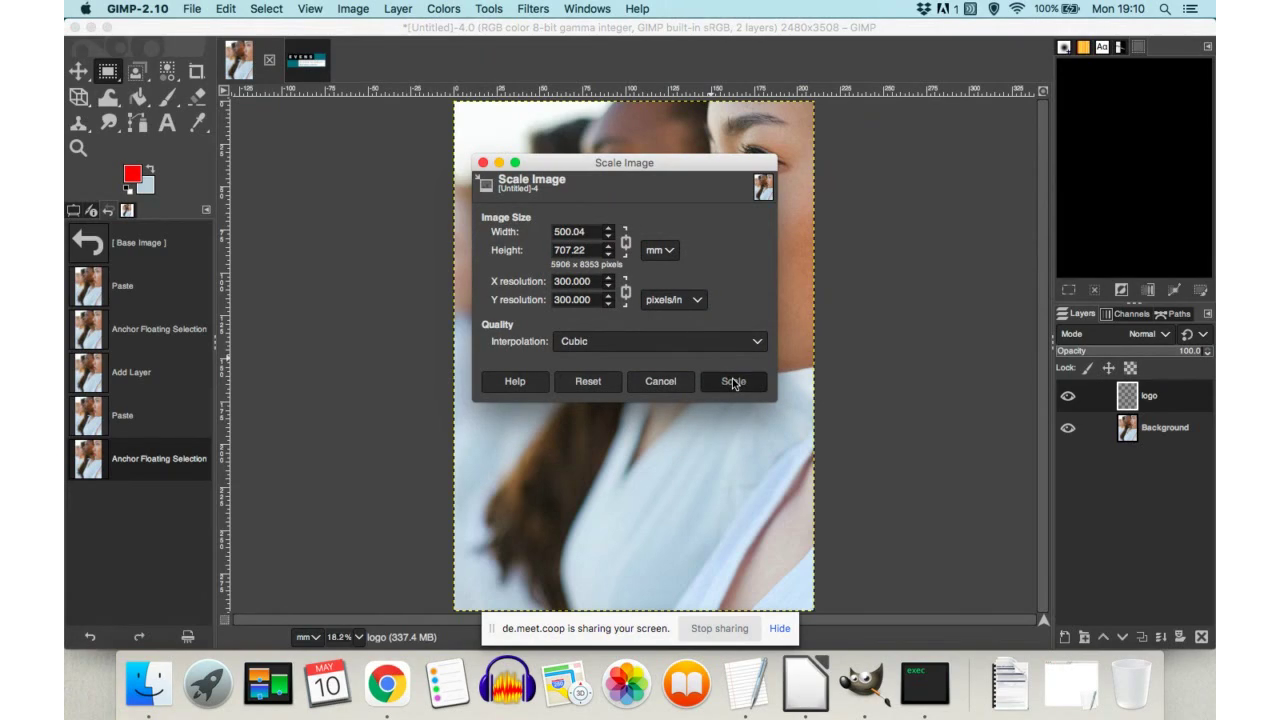 To scale while image select Image>Scale image, but try changing
canvas too to see what happens – it may be of use. To scale
selected elements, chose Scale tool for the toolbox – it is 6th
icon from the Move tool. Sometimes it is hidden and can be accessed
if you hover cursor over the icon to allow little dialogue box to
appear with description of all possible transformations.
To scale while image select Image>Scale image, but try changing
canvas too to see what happens – it may be of use. To scale
selected elements, chose Scale tool for the toolbox – it is 6th
icon from the Move tool. Sometimes it is hidden and can be accessed
if you hover cursor over the icon to allow little dialogue box to
appear with description of all possible transformations.
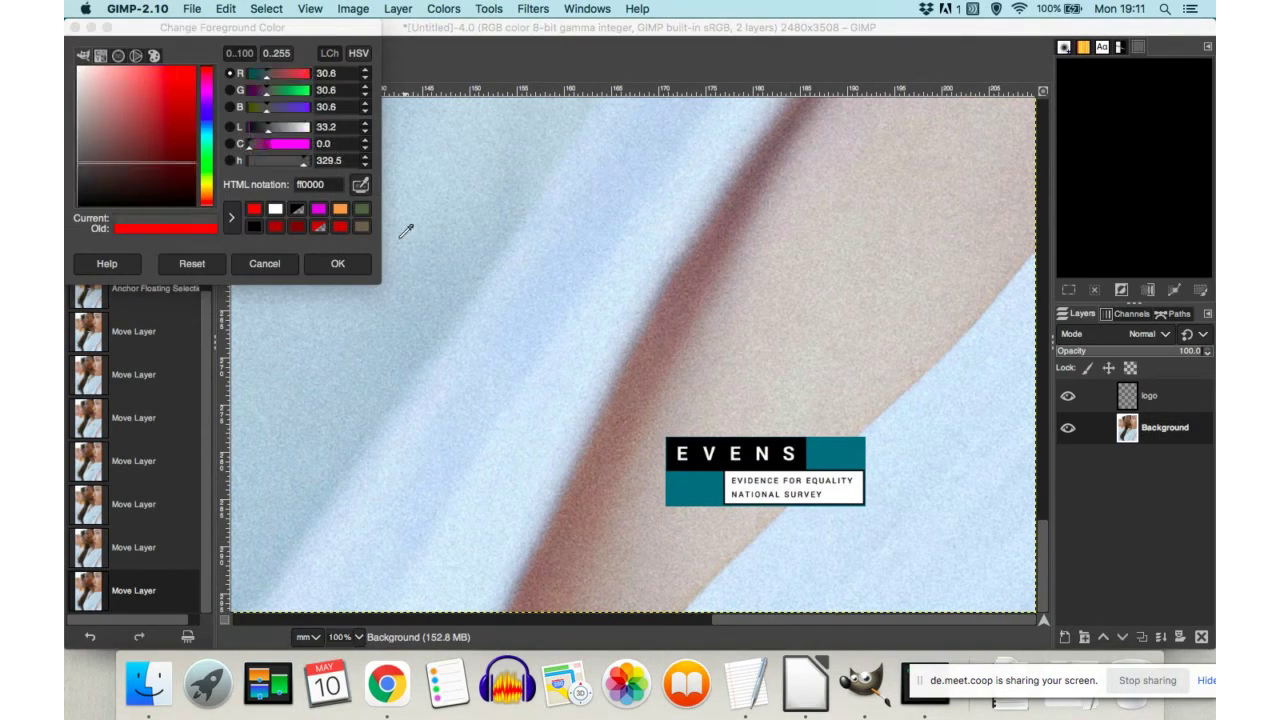 The
next thing
Sam did here is creation
of a solid colour box on top of which she will later add text. She
used colour picker tool form the toolbox on top-left, clicked on
green parts of the logo and clicked OK on the pop-up box you can see
in the image above.
The
next thing
Sam did here is creation
of a solid colour box on top of which she will later add text. She
used colour picker tool form the toolbox on top-left, clicked on
green parts of the logo and clicked OK on the pop-up box you can see
in the image above.
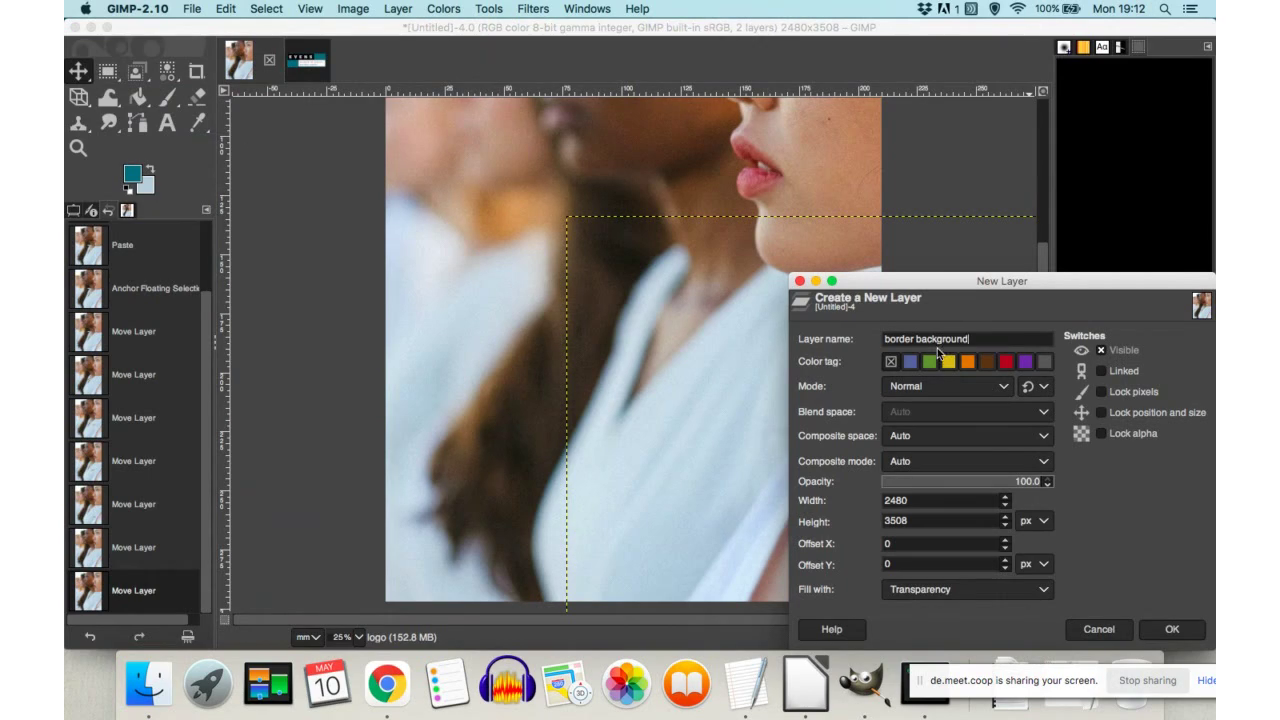 She then created a new layer with transparent fill and named it in a way
that is easy to recognise content form the name.
She then created a new layer with transparent fill and named it in a way
that is easy to recognise content form the name.
 Next step, Bucket fill tool. Select the tool first by clicking on the icon
in the toolbox. Click on the rectangular selection and colour will
fill the area.
Next step, Bucket fill tool. Select the tool first by clicking on the icon
in the toolbox. Click on the rectangular selection and colour will
fill the area.
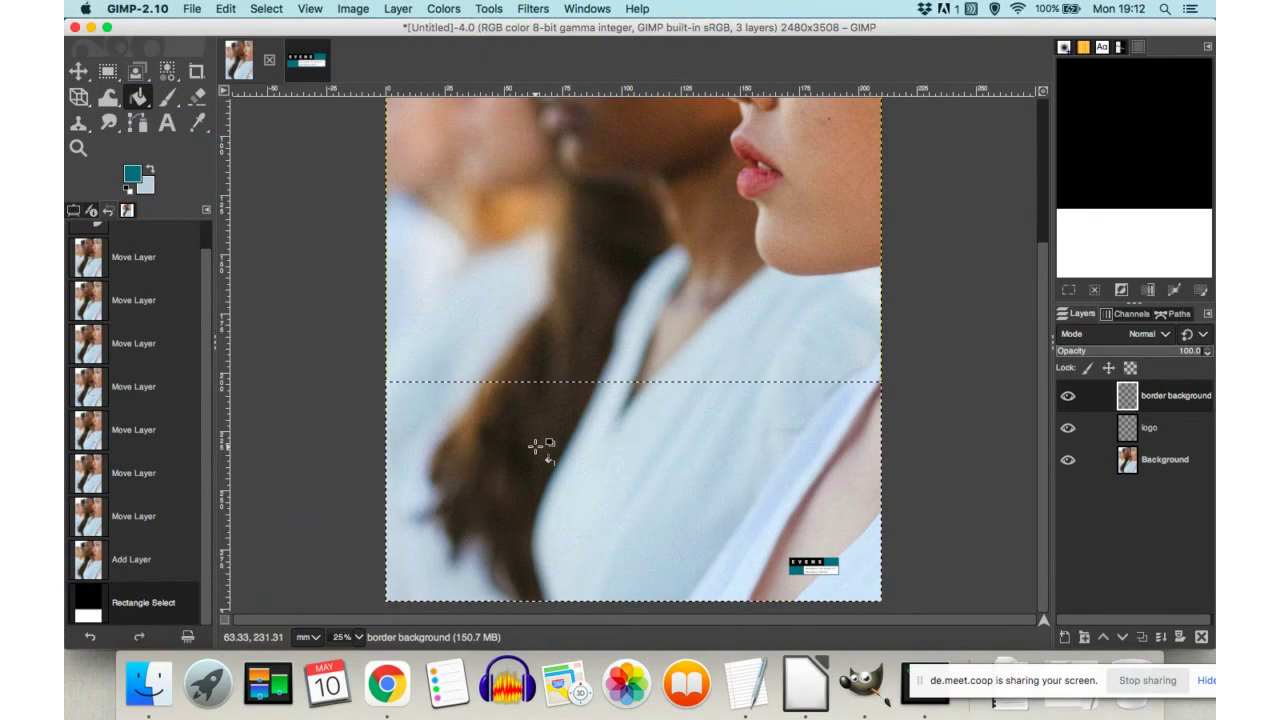
 After
filling the rectangular block, Sam
changed
its size to fit better with the whole image. One
of the ways to do this is to click
on the layer, and then stretch to desired size by clicking on one of
the corner arrows which will appear at the corners of the box.
After
filling the rectangular block, Sam
changed
its size to fit better with the whole image. One
of the ways to do this is to click
on the layer, and then stretch to desired size by clicking on one of
the corner arrows which will appear at the corners of the box.
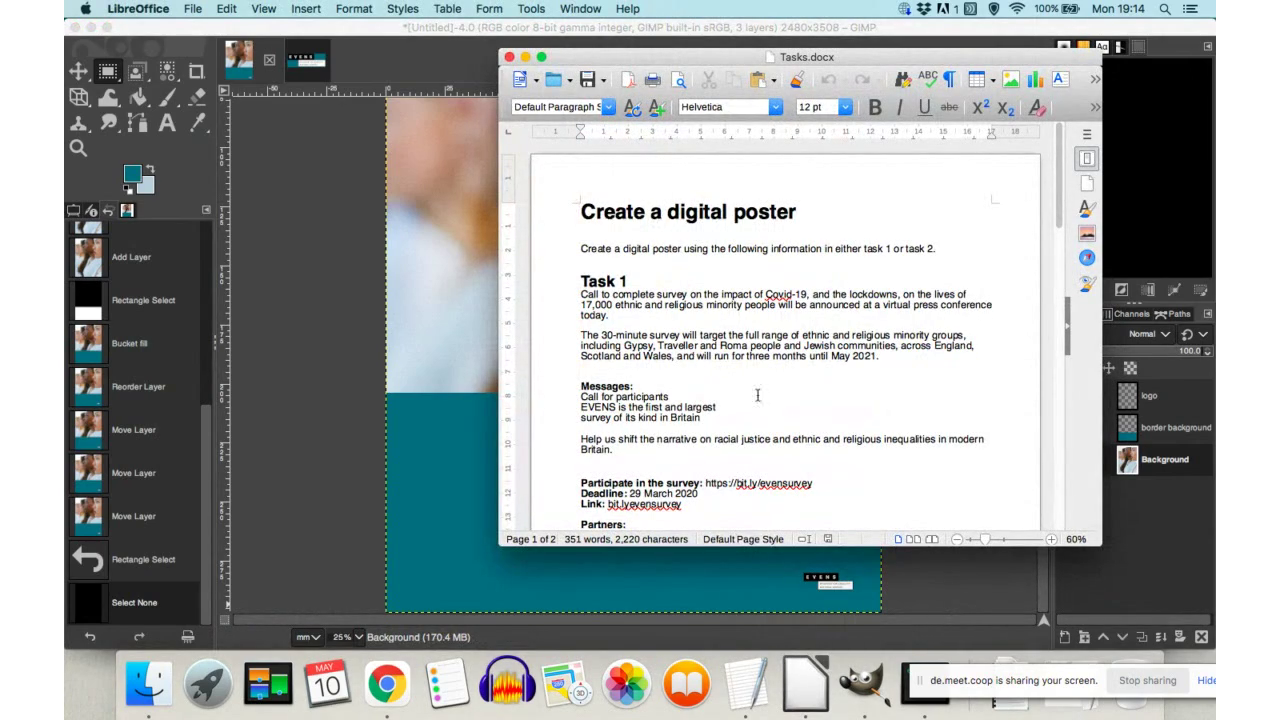 Now, on to the text. Open the task office document (link here),
select title text & copy to transfer to the image. Preparing text
in an office document helps with typos – good practice to check all
first.
Now, on to the text. Open the task office document (link here),
select title text & copy to transfer to the image. Preparing text
in an office document helps with typos – good practice to check all
first.
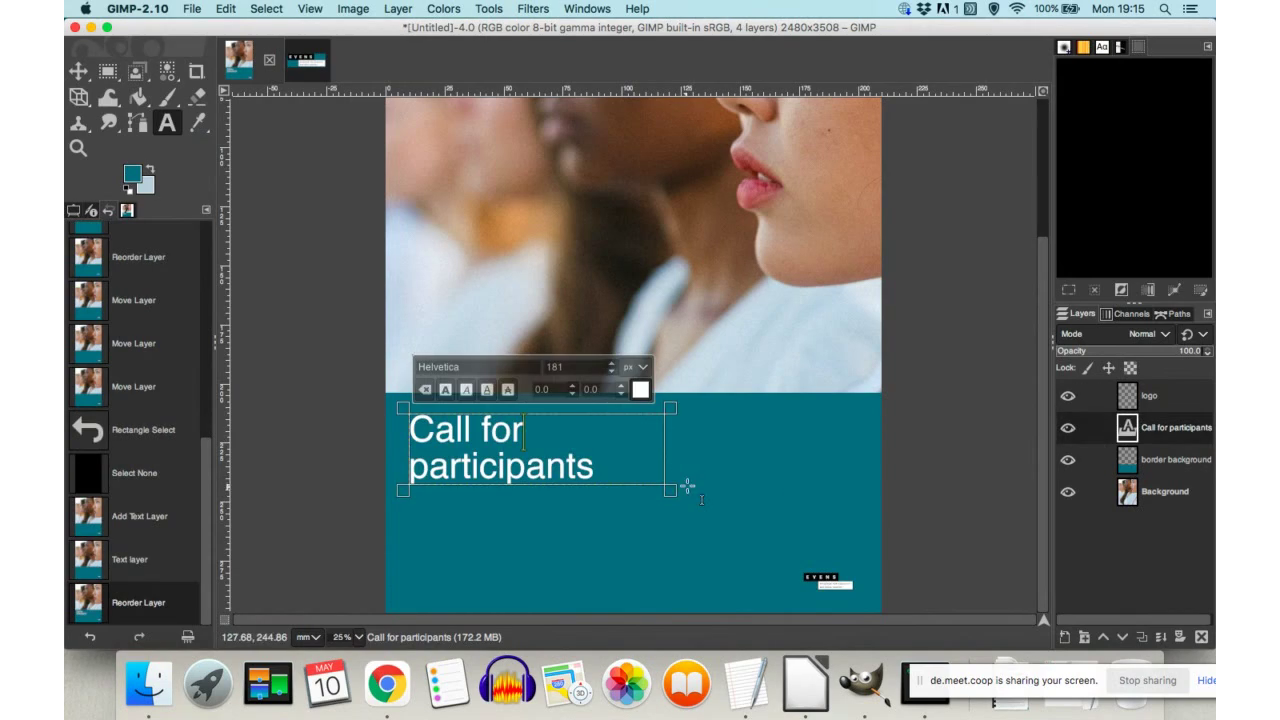 To add text of any kind, in this case the title, select 'A' icon
form the toolbox and click in the are of the image where you’d like
to add the text. Then you paste the text inside the text box and
change font, colour, style and size of the text.
To add text of any kind, in this case the title, select 'A' icon
form the toolbox and click in the are of the image where you’d like
to add the text. Then you paste the text inside the text box and
change font, colour, style and size of the text.
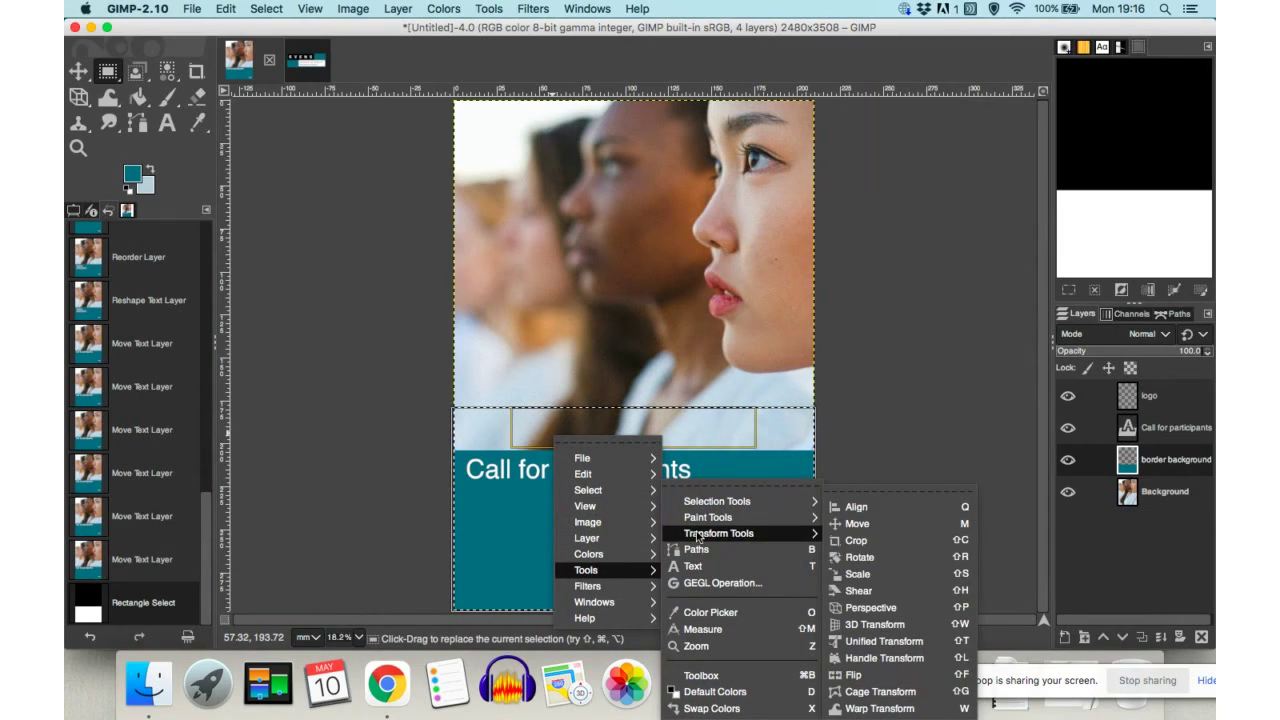 To
move
text around and
find the best place in the composition, whilst keeping some geometry
about it and harmony between elements (text, image, etc), you can
either start by selecting the layer you like to move around and then
click on the Move tool (first icon on top-left in the toolbox) –
then move the selected object. Or, you can access the same tool by
right-click on the object, whether text or image, and then selecting
Tools>Move tool form the pop up menu (as in the picture above). I
any case please remember appropriate layer must be selected forts to
be able to apply the change to the layout.
To
move
text around and
find the best place in the composition, whilst keeping some geometry
about it and harmony between elements (text, image, etc), you can
either start by selecting the layer you like to move around and then
click on the Move tool (first icon on top-left in the toolbox) –
then move the selected object. Or, you can access the same tool by
right-click on the object, whether text or image, and then selecting
Tools>Move tool form the pop up menu (as in the picture above). I
any case please remember appropriate layer must be selected forts to
be able to apply the change to the layout.
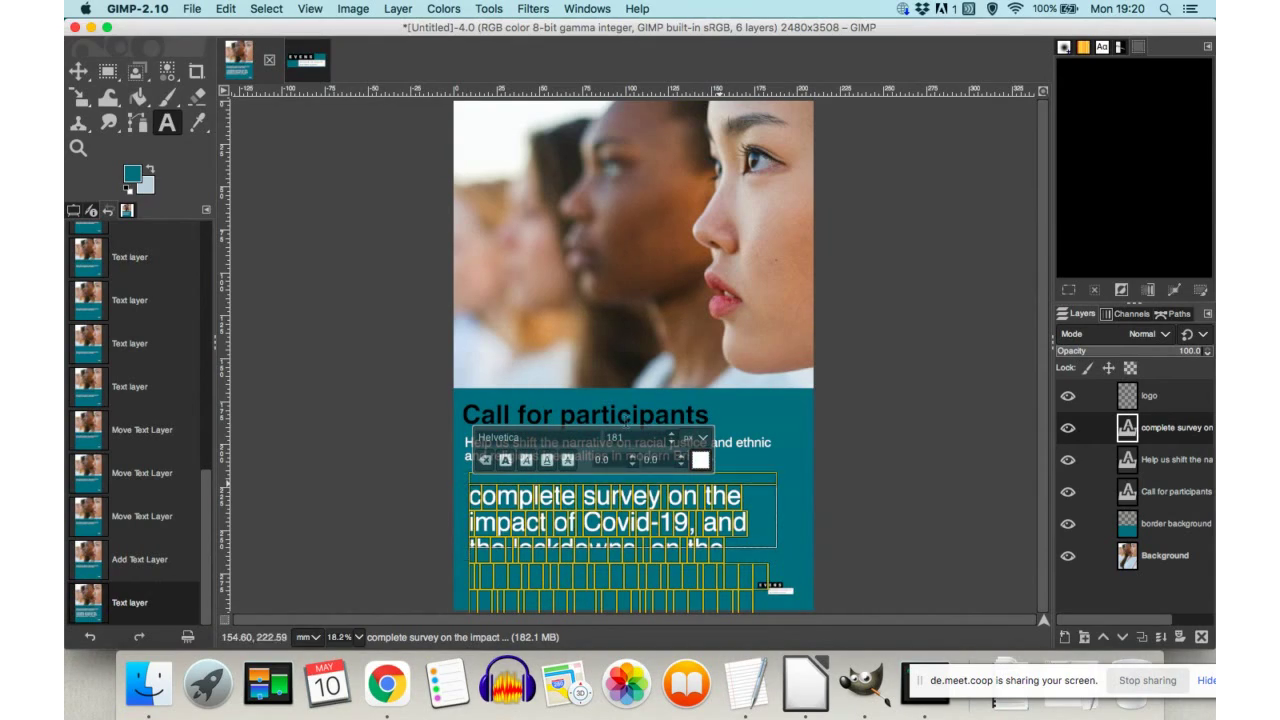 Add
more text, fix size&colour.
Once
you finished editing the text, take a look at the composition and
check whether you need to fix details such a alignment of text or any
other part of the design. We often use Guides and Grids to do this.
You can access them by selecting View>Show Guides or Grids from
the main drop down menu.
Add
more text, fix size&colour.
Once
you finished editing the text, take a look at the composition and
check whether you need to fix details such a alignment of text or any
other part of the design. We often use Guides and Grids to do this.
You can access them by selecting View>Show Guides or Grids from
the main drop down menu.
 Done
and ready for publishing – for print (300dpi resolution), for
screen (72dpi resolution). Resolution can be adjusted via Image>Image
size down down, although it needs to though about for the beginning
when you set up a new file.
Done
and ready for publishing – for print (300dpi resolution), for
screen (72dpi resolution). Resolution can be adjusted via Image>Image
size down down, although it needs to though about for the beginning
when you set up a new file.